Ubuntu 16.04 alongside Windows 7/8/10 for Data Science
Having a Lenovo Y500 laptop with good specs (8GB RAM, 4 processors) that runs on Windows 7 made me feel limited when it came to scientific computing. Unix based systems like Linux and Mac OS are more convenient to use than Windows systems. As a result, after doing some research I decided to install a Linux distribution Ubuntu 16.04 aka Xenial alongside my Widnows 7 OS. This gives me the option to boot any of the two. I heavily use Python 2.7, 3.5 and R which I all install on my new Ubuntu partition. Below are the steps that worked for me. Hopefully, you find them useful.
Tabe of contents
- Dual Boot Windows 7/8/10 and Ubuntu 16.04 Xenial
- Install R
- Install Rstudio
- Install Git
- Install Python 2.7 and 3.5 (Anaconda distribution and virtual environment)
- Install Sublime Text 3
Dual Boot Windows 7/8/10 and Ubuntu 16.04 Xenial
Create Bootable USB
You will need to have
- Ubuntu 16.04 ISO
- Rufus to create a bootable USB Device
- A USB device with at least 8GB space
You can start with burning the Ubuntu ISO onto the USB drive using Rufus. Just launch Rufus choose the ISO, the USB drive and press the start button. Now, you have a bootable USB drive with Ubuntu 16.04.
Partition Hard Drive
Now, we need to create free space on the HD for the Ubuntu 16.04 to be installed on. There are a lot of guides online and I present the way that worked for me. I use the Windows default app diskmgmt.msc. Just search for it and launch it. Choose the hard disk with the most free space on it. Right click on it and choose shrink option. You only have to shrink it by 20GB. It is enough for Ubuntu 16.04 and 18GB of storage for your files. You can go above 20GB of course. That’s it. At this point we can boot Ubuntu Xenial and install it if we like it.
Boot from USB and Install
Whatever laptop you have bring up the boot menu on startup. For me (Lenovo Y500) there is a button on the left behind the power plug. In the boot menu you should see an option for a USB drive. Boot from the USB and you will see
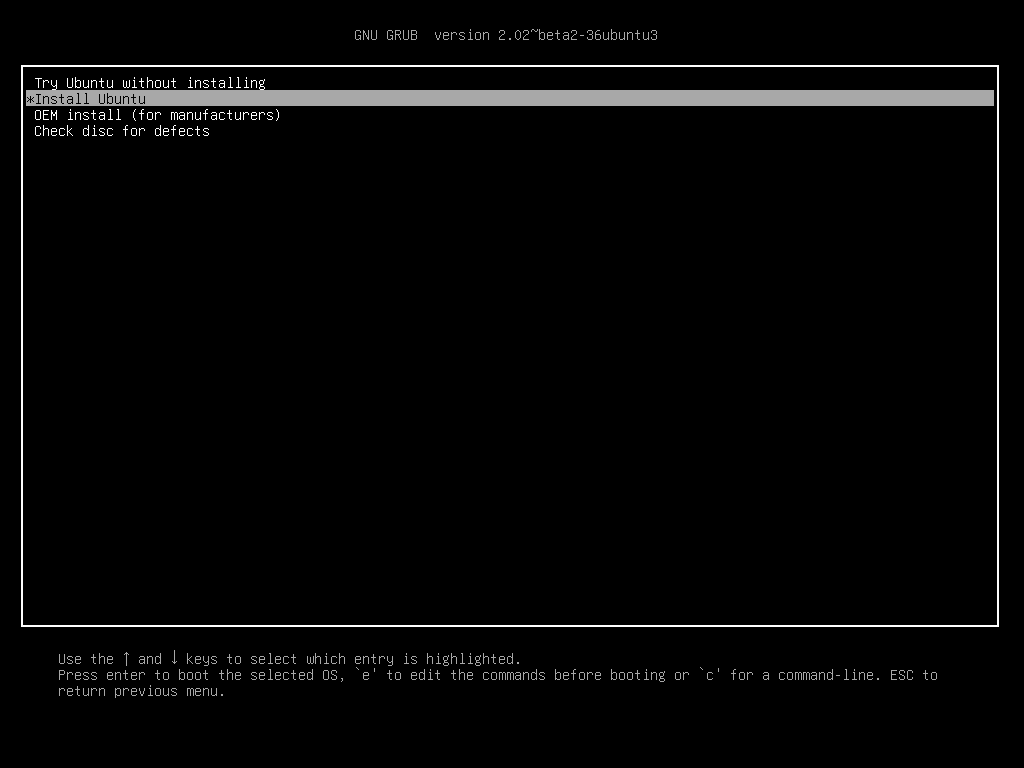
You can try Ubuntu Xenial out first by going with the first option (Try Ubuntu without installing). Once you are convinced it is great (more convenient than Windows for data purposes at least), shutdown, boot from USB again and install it. At some point you will see this
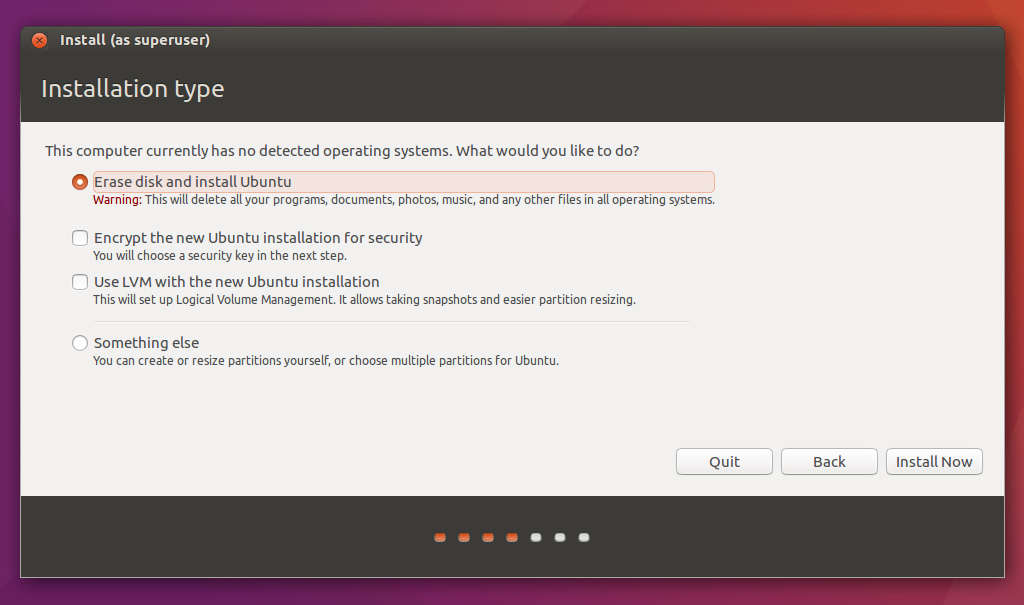
Normally, after you shrank one of your partitions and allocated free space of 20GB or above there should also be an option Install alongside Windows. If you do not see it after going through previous steps let me know and I will look into it.
Finally, once installed run in terminal
sudo update-grub
This will update the boot loader menu and nexxt time you see boot menu you will be able to choose Ubuntu or Windows. Lets move on to installing statistical software.
Install R
To install R on Ubuntu 16.04 aka Xenial execute the below commands in terminal.
sudo add-apt-repository ppa:marutter/rrutter
sudo apt-get update
sudo apt-get install r-base r-base-dev
Install Rstudio
Now, that we have R installed lets get Rstudio.
sudo apt-get install gdebi-core
wget https://download1.rstudio.org/rstudio-0.99.902-amd64.deb
sudo gdebi -n rstudio-0.99.902-amd64.deb
rm rstudio-0.99.902-amd64.deb
Install Git
sudo apt-get install git
Install Python 2.7 and 3.5 (Anaconda distribution and virtual environment)
We will install Anaconda 2.3 Python distibution and then create a virtual Python 3.5 environment using conda.
Instal Anaconda Python 2.7
First, install Anaconda 2.3 which is based on Python 2.7 .
wget https://3230d63b5fc54e62148e-c95ac804525aac4b6dba79b00b39d1d3.ssl.cf1.rackcdn.com/Anaconda-2.3.0-Linux-x86_64.sh

bash Anaconda-2.3.0-Linux-x86_64.sh
rm Anaconda-2.3.0-Linux-x86_64.sh
You will be promted to read the user agreement and set some parameters during installation. Go through it and once the installation is finished run below commands and you will see something like this.
koba@kobakhit:~$ exec bash
koba@kobakhit:~$ python
Python 2.7.10 |Anaconda 2.3.0 (64-bit)| (default, May 28 2015, 17:02:03)
[GCC 4.4.7 20120313 (Red Hat 4.4.7-1)] on linux2
Type "help", "copyright", "credits" or "license" for more information.
Anaconda is brought to you by Continuum Analytics.
Please check out: http://continuum.io/thanks and https://binstar.org
>>> exit()
Type exit() and enter to get back to bash.
Install Anaconda Python 3.5 virtual environment
Anaconda is installed and is the default python executable. Second, lets create Python 3.5 virtual environment. Below info is taken from a concise cookboook.
To install a virtual python environment you want use this command template conda create -n yourenvname python=x.x anaconda. For example, I created a virtual python 3.5 environment called tpot. For a list of available python versions type conda search "^python$".
conda create -n tpot python=3.5 anaconda
To activate and deactivate your virtual environment type
source activate tpot
source deactivate tpot

# remove a virtual enironment
conda remove -n tpot -all
Now, you have Python versions 2.7 and 3.5 with all the Numpy, Scikit-Learn, Pandas, etc. packages already installed thanks to Anaconda distribution. As a finishing touch lets install jupyter to work with IPython notebooks.
conda install jupyter
You will have to install one for your virtual environment as well. Recall, I created a virtual env called tpot previously. You might need to close and reopen the terminal for the source activate to work.
source activate tpot
conda install jupyter
source deactivate
To start IPython run jupyter notebook which will create a tab in your browser.
Install Sublime Text 3
This is my choice of text editor.
sudo add-apt-repository ppa:webupd8team/sublime-text-3
sudo apt-get update
sudo apt-get install sublime-text-installer
Conclusion
There are several distros created for scietific computing that have some software preinstalled. To name a few
For software highlights of each you can refer to this article. I can promise you that none at the moment of writing had all the software I wanted installed (R and Rstudio, Anaconda Python 2.7 and 3.5). Until somebody releases a data science Linux distro Ubuntu Xenial is the most optimal choice in terms of flexibility and convenience.
Bonus
Install Jekyll (static website generator)
sudo apt-get install jekyll